HINTS & TIPS
I know how much we all hate having to read the instructions when we buy a kit but I can not stress too much how important it is so that you get the most enjoyment and best results from your kit or project. Here are a few bullet points to get you started!
Finishing Suggestions
If you have chosen not to turn under and work through both layers of canvas on the edges of your project, I would recommend trimming unworked canvas around the hooked design to approximately 1.5 inches, unless of course you have one of my kits and it should be the right margin already. Fold the edges firmly to the back of the rug. This can then be basted in place but for a neat and lasting finish use rug binding (this can be purchased here and other online sites or haberdashery departments). The binding is sewn all around the outside edge of the rug and then the inside edge is stitched, covering the turned back canvas edge. (I also supply a 'Stitch Kit')The binding is mitered at the corners so the rug will lay flat. For a video tutorial on how bind your rug, click on my 'About' page and scroll to the bottom. For a circular rug binding tutorial click here and scroll to bottom of page.
Cleaning and Care of Hooked Rugs
The following is for my own kits and supplies. You can just shake your rug and hang it out in the sunshine to freshen it up. It can be hand washed but this can be tricky due to the size of the finished article! You could also use a domestic carpet cleaning machine. You can machine wash your rug occasionally but I would only advise this if you have a delicate or gentle wash cycle on your machine and trust it completely, otherwise DO NOT MACHINE WASH. I would highly recommend Scotch guarding your rug, easy and inexpensive (available online and in hardware stores). Also a great way to secure the yarn knots is to spray the back with a rubber fixative. This not only stops the knots from loosening but also prevents your rug from slipping on Tiled and laminate flooring. Check this product out and watch how to do it here.
- After opening your kit, I would say the first thing to do is to check each colour on your sample card against each colour on the design chart or canvas BEFORE you begin. Make sure you know which is which and then there will be no disappointing mistakes. If in doubt, a helpful tip is note how much there is of each colour and roughly how much of it is used in the design. That way, if you have two colours very close in tone, you can differentiate.
- If desired, to prevent snagging, you can cover the raw edges of the canvas with masking tape.
- If you are new to latch hooking I would recommend the easiest way to get going is to sit at a table with the canvas spread out in front. Each row is best worked along the table edge and moved down as each row is completed. Once you have got the hang of Latch Hooking you can sit on the sofa and watch the TV if you want to!
- To stop your canvas slipping use something heavy to weigh it down. (I use a couple of bricks!)
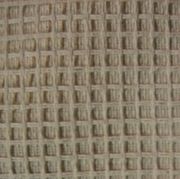
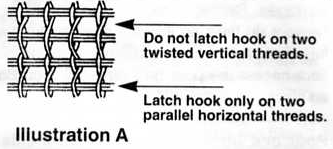
- When you look closely at the canvas you can see it has parallel horizontal threads and twisted vertical threads. In latch hooking, knots are made only over the horizontal threads, never over the vertical twisted threads. (See Illustrations below). This is because they are the strongest in Interlocked canvas.
- VERY IMPORTANT A margin of at least 4 rows of unworked canvas must be left around the outside of your project to turn under or it can be turned under and as you work you latch hook through both layers. For a video tutorial on how to do a folded double canvas latch hook edge, click on my 'About' page and scroll down to the correct video.
- On the design chart, each square represents one knot and each knot is represented by a different colour.
- Start the design at the lower left corner of the canvas (marked in black marker pen with my kits); right corner if left handed.
- I recommend you latch hook along each row, working upwards on each horizontal rows from left to right (right to left if left handed). This keeps the yarn knots out of your way as you work as you can give them a good tug and smooth them down out of the way as you go along.
- Do not be tempted to turn your canvas around and work from the opposite side. As once you have started, your knots all need to lie in the same direction or it will look odd.
- For a beginner I suggest you complete one row at a time, using the colours corresponding with the design. However, if you feel confident and have a good quality canvas that wont warp then you can work in blocks or each grid square. This is very satisfying and gives you more of an idea as to what your design is going to look like.
Finishing Suggestions
If you have chosen not to turn under and work through both layers of canvas on the edges of your project, I would recommend trimming unworked canvas around the hooked design to approximately 1.5 inches, unless of course you have one of my kits and it should be the right margin already. Fold the edges firmly to the back of the rug. This can then be basted in place but for a neat and lasting finish use rug binding (this can be purchased here and other online sites or haberdashery departments). The binding is sewn all around the outside edge of the rug and then the inside edge is stitched, covering the turned back canvas edge. (I also supply a 'Stitch Kit')The binding is mitered at the corners so the rug will lay flat. For a video tutorial on how bind your rug, click on my 'About' page and scroll to the bottom. For a circular rug binding tutorial click here and scroll to bottom of page.
Cleaning and Care of Hooked Rugs
The following is for my own kits and supplies. You can just shake your rug and hang it out in the sunshine to freshen it up. It can be hand washed but this can be tricky due to the size of the finished article! You could also use a domestic carpet cleaning machine. You can machine wash your rug occasionally but I would only advise this if you have a delicate or gentle wash cycle on your machine and trust it completely, otherwise DO NOT MACHINE WASH. I would highly recommend Scotch guarding your rug, easy and inexpensive (available online and in hardware stores). Also a great way to secure the yarn knots is to spray the back with a rubber fixative. This not only stops the knots from loosening but also prevents your rug from slipping on Tiled and laminate flooring. Check this product out and watch how to do it here.
Following a design chart
|
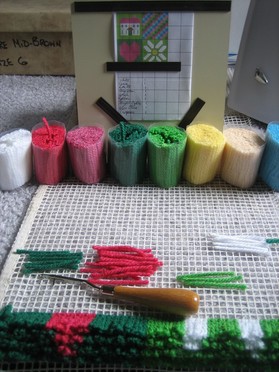
We all have different ways of following the design chart for a kit. Lots of us draw a line through each row as we do it or mark it off or even just use the grid markings to check where we are. I like to use a magnetic chart holder. This way I can stand the design up wherever I am working and then just move the magnetic rulers up as I work and I never loose sight of where I am and it doesn't matter when the TV distracts me!
|
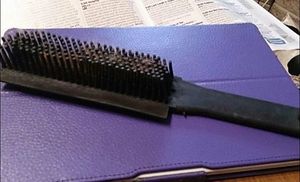
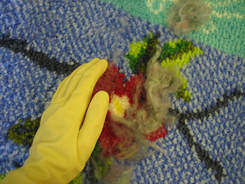
Removal of fluff!At the end of every latch hook project there is always lots of fluff from the yarn all over the surface of your project. I use rubber gloves for the friction and just run over the surface in different directs to collect it all up and dispose of. One of my lovely customers, Ros, likes to use a rubber upholstery brush, which is a great idea too!
|
A little information on Latch Hook Rug Canvas
|
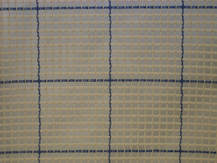
Latch Hook Rug canvas comes in different grid sizes. This is called HPI(Holes Per Inch). The most common sizes used are 3.3hpi, 3.75hpi (mainly the US) and 4hpi. Which canvas you use depends on the thickness of your rug yarn and how dense you want your finished project to be. If you are not sure what HPI your rug canvas is, just get a ruler and lay it down on your canvas along a parallel row of canvas. Starting from one hole, count how many holes there are for just 1 inch. I use 3.3hpi Grid Marked Interlocked canvas made by Zweigart. It is perfect for the Super Latch Rug Yarn that I use in all my kits and online shop and the quality is wonderful. Also the Blue Grid markings are invaluable whilst latch hooking as they help you to keep track of where you are.
When you look closely at the canvas you can see it has parallel horizontal threads and twisted vertical threads. In latch hooking, knots are made only over the horizontal threads, not over the vertical twisted threads
(Illustration A). This is because the Parallel threads are stronger and the twisted threads are to lock them in place and that's is why it is called Interlocked canvas. |
CONTRIBUTIONS FROM FELLOW LATCH HOOKERS!
|
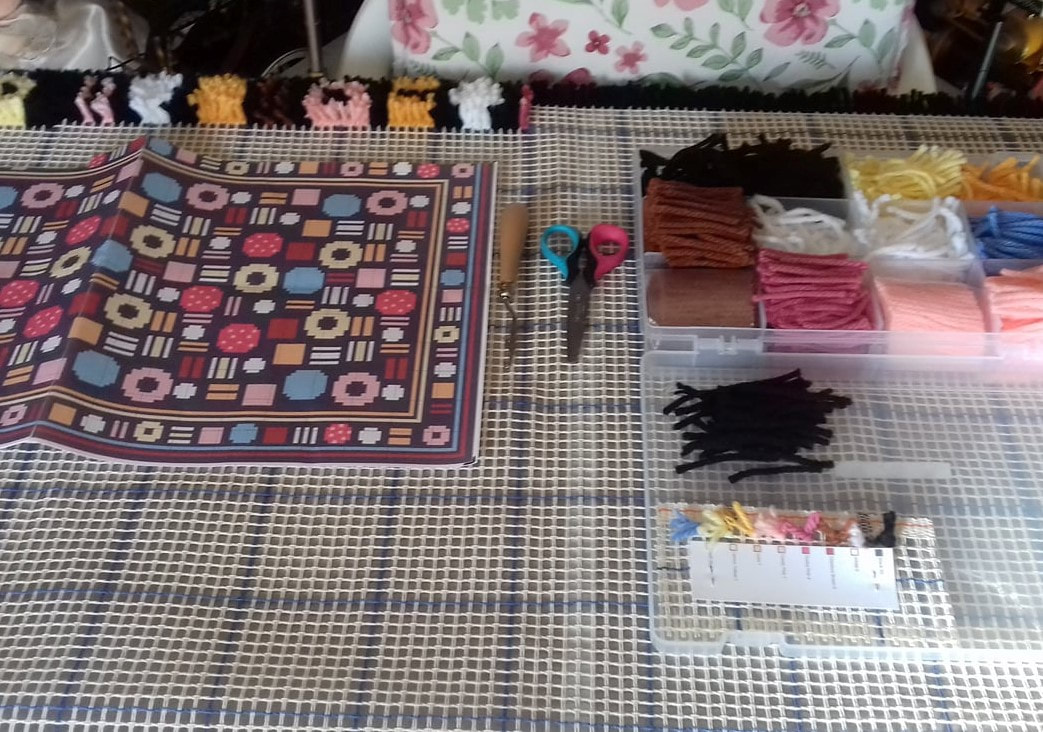
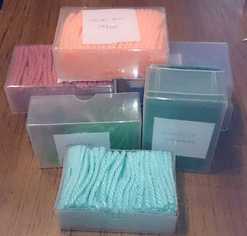
I bought a fold up table from Robert Dyas and I have it set up one end of my lounge facing the TV. I call it my 'factory area'. I use craft boxes for the yarn with separate departments. One pack of yarn fits neatly in each section.They also have a lid and stack neatly if you have more than one. I used to mark with the pattern with a black marker pen when I had completed a section but now I cut it out. I don't use weights but with the size of my table I can fold the finished rug over to stop the rug falling off the table. As for the rug fluff I have just bought a new hoover and it is fantastic for picking up the excess fluff that gets on the rest of the carpet. (I didn't buy this just for the fluff though). Hope these tips help. Teresa
|
Above kit Allsorts available in my Store.
|
